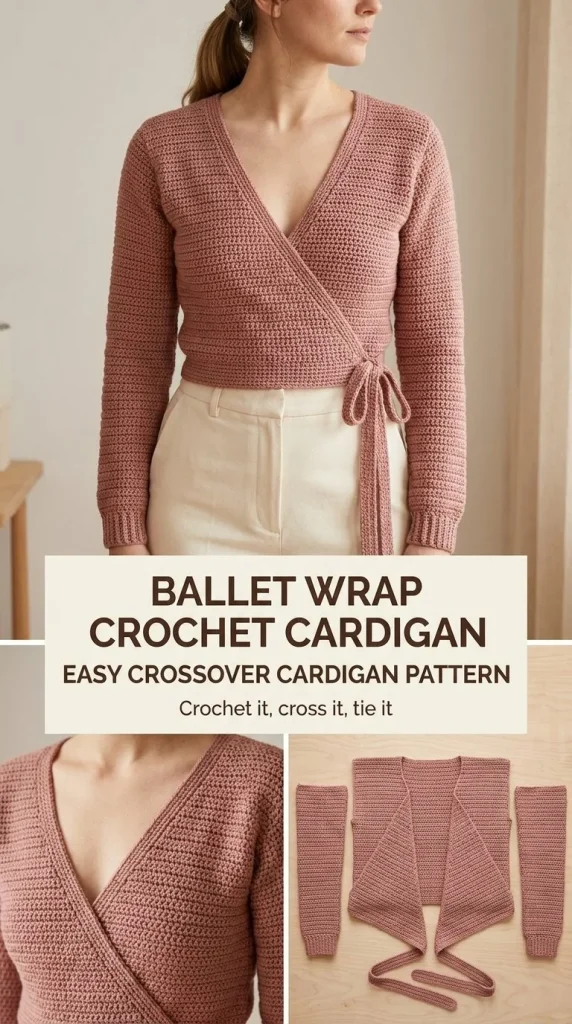
The Ballet Wrap Crochet Cardigan is a stylish and versatile piece perfect for adding a touch of elegance to any outfit. Crocheting this cardigan allows you to create a unique garment that is both comfortable and flattering, making it an enjoyable project for those who love to craft. This project is especially ideal for those looking to practice their skills while having fun. If you’re interested in exploring more crochet patterns, check out this cozy fall crochet pattern for additional ideas.
Skill Level
This project is suitable for confident beginners. It incorporates basic crochet stitches and techniques while introducing some shaping elements, making it an excellent way to build your skills without feeling overwhelmed.
Materials
For this crochet project, you will need the following materials:
- DK #3 or light worsted #4 yarn
- 4.5mm crochet hook
- Tapestry needle
- Stitch markers
- Measuring tape
- Gauge: approximately 16 hdc = 4 in/10 cm
Abbreviations — US Terms
- ch – chain
- sl st – slip stitch
- sc – single crochet
- hdc – half double crochet
- st(s) – stitch(es)
Special Stitches
Half Double Crochet (hdc)
To work a half double crochet, yarn over, insert your hook into the designated stitch, yarn over again, pull through, yarn over once more, and pull through all three loops on your hook.
Gauge
The gauge for this project is approximately 16 hdc = 4 in/10 cm. While working on this cardigan, it’s important to maintain consistent tension, especially if you plan to make adjustments to fit.
Finished Size
The finished size of the cardigan will vary based on the size you choose to make, typically offering a bust measurement with 2-4 in positive ease.
Pattern Notes
- This cardigan is worked in rows, with the back and front panels made separately.
- Stitch markers are highly recommended for keeping track of decreases and to ensure that both front panels are mirrored.
- The work will be turned at the end of each row, and no rounds will be joined.
- Remember to measure as you go to ensure a perfect fit!
Crochet Instructions
Back Panel
- Foundation Row: Begin with a foundation chain that is the width of the finished bust measurement divided by 2. This typically means chaining about 30-35 stitches, depending on your size preference.
- Row 1: In the second chain from the hook, work 1 hdc in each chain across. Turn. (Total: 29 hdc)
- Row 2: Ch 1 (does not count as a st), hdc in each st across. Turn. (Total: 29 hdc)
- Rows 3-: Continue working in hdc until the piece measures from your natural waist to your shoulder, ending on a right-side row.
Front Panels
Each front panel is worked separately and begins around one-quarter of the finished bust width.
- Foundation Row: Chain a length similar to the width obtained by dividing the finished bust measurement by 4. For example, you might chain 15-20 stitches, depending on your size.
- Row 1: In the second chain from the hook, work 1 hdc in each chain across. Turn. (Total: X hdc, where X is your stitch count)
- Row 2: Ch 1, hdc in each st across. Turn.
- Rows 3-: Work straight until you reach a point halfway between your waist and shoulder.
- Diagonal Shaping: At the inner front edge, begin decreasing by working 1 less st every row or every second row, continuing until the shoulder width matches that of the back panel.
Make the second front as a mirror image of the first, ensuring both sides match perfectly.
Joining
- Once both front panels are complete, position them on top of the back panel with right sides facing each other. Use stitch markers to hold them temporarily.
- Join the shoulder seams with sl st or sc.
- Sew the side seams together, leaving space for the armholes.
Sleeves
- For the sleeves, chain a length that can begin straight or lightly tapered based on your preference. A starting chain of around 20-25 stitches is recommended.
- Work in hdc back and forth until your desired sleeve length is achieved.
- To create a tapered fit, decrease 1 st on each edge every 6-8 rows as desired.
- Seam the sleeves to the armholes.
Wrap Tie
- In the lower inner edge of each front, join yarn and chain approximately 70-100 for the long wrap tie.
- Work either sc or sl st back along the chain until you reach the end.
- Repeat on the other side.
Finishing
- Work 1-2 rounds of sc around the front and neck edges to give the cardigan a polished look.
- Weave in all ends and ensure that your seams are secure.
Care
To keep your cardigan looking fresh, it’s advisable to hand wash it in cool water and lay it flat to dry. Always refer to your yarn label for specific care instructions.
Tips for the Best Result
- Use stitch markers to track your decreases, especially on the fronts, to ensure they mirror each other correctly.
- Measure as you go to ensure the fit is perfect, especially around the shoulders and armholes.
- Consider using a smoother yarn for ease of working with stitches.
Common Mistakes
Uneven Sleeves
This usually occurs when the same number of increases or decreases isn’t applied to both sleeves. Ensure both sleeves are done consistently.
Inaccurate Measurements
Avoid skipping measurements. Regularly checking your work against your sizing guide can help prevent mistakes.
As you embrace this pattern, don’t forget to explore additional resources or similar projects like the beginner-friendly cherry blossom crochet hair comb pattern to further enhance your crochet skills. Enjoy crafting your new cardigan!



