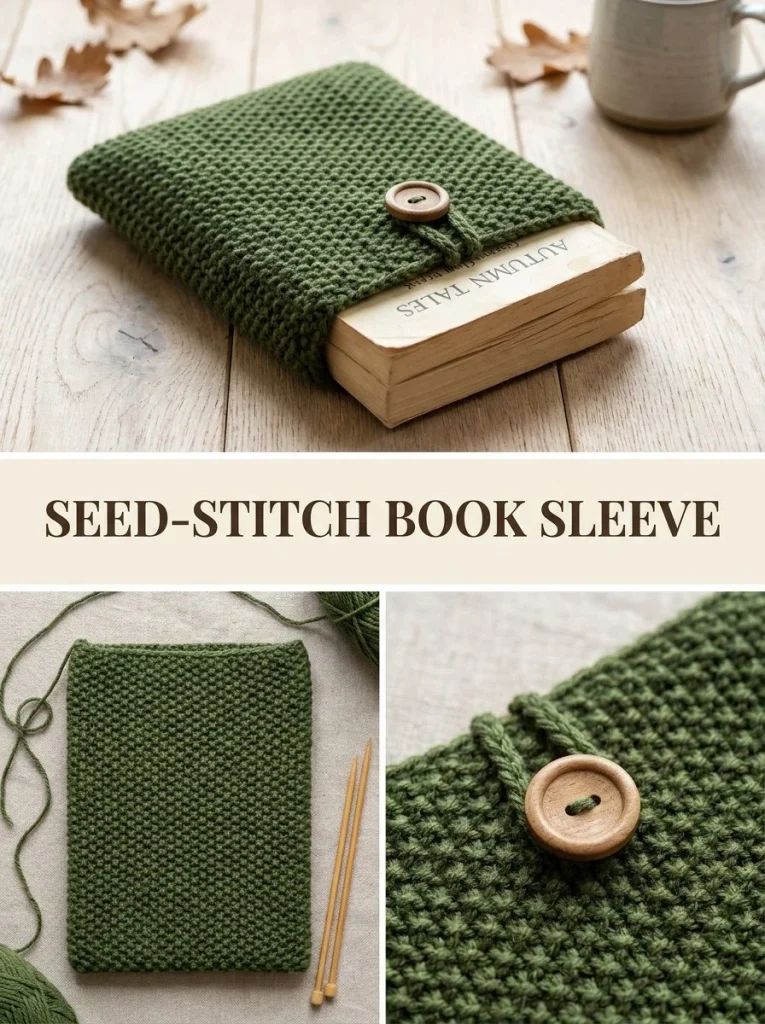
This beautifully crafted Moss Seed-Stitch Book Sleeve combines practicality and aesthetics, making it an ideal project for both beginner and intermediate knitters. With its textured surface and snug fit, this accessory is perfect for protecting your favorite paperback books or small e-readers. The construction process is straightforward, focusing mainly on the delightful seed stitch technique that not only adds charm but also ensures durability.
Creating this book sleeve offers a unique way to practice your knitting skills, while also resulting in a useful item for everyday life. The deep moss green yarn not only invokes a sense of coziness but is also versatile enough to match various decor and personal styles. For those who enjoy adding a personal touch to their crafts, this project serves as an excellent canvas for creativity.
Pattern at a Glance
- Skill level: Intermediate
- Terminology: US knitting terms
- Construction: Flat knitting with assembly
- Finished size: About 6.5 in / 16.5 cm wide x 9 in / 23 cm high
- Yarn weight: Worsted-weight
- Needles: US 8 (5.0 mm) knitting needles
- Main stitch: Seed stitch
- Gauge: About 18 sts and 28 rows = 4 in / 10 cm
- Motifs: None
- Layout: Rectangle
- Joining: Seaming with mattress stitch or whipstitch
- Seaming: Bottom edge and one side seam
Materials
To create your Moss Seed-Stitch Book Sleeve, gather the following materials:
- Worsted-weight wool or cotton-blend yarn in a deep moss green
- US 8 (5.0 mm) knitting needles for the body of the sleeve
- Optional 3.5-4.0 mm needles for the I-cord loop
- Tapestry needle for weaving in ends
- Scissors for cutting yarn
- One 3/4 in / 19 mm button to secure the button loop
Each material plays a vital role in ensuring that your final product is both attractive and functional. For instance, the yarn choice directly influences the sleeve’s softness and flexibility, while the knitting needles determine the overall structure of the piece.
Yarn and Color Notes
When selecting yarn for your project, consider the following:
- Fiber characteristics: A wool or cotton-blend is recommended for warmth and durability. Wool offers elasticity and excellent shape retention, while cotton tends to be softer and breathable.
- Color combinations: Deep moss green provides a subtle, earthy aesthetic, but feel free to experiment with different colors to match your personal style or decor.
- Solid vs. variegated yarn: A solid color will highlight the texture created by the seed stitch, whereas variegated yarn may create a dynamic look based on color changes.
Finished Measurements
The completed Moss Seed-Stitch Book Sleeve will measure approximately 6.5 inches wide x 9 inches high. This size is particularly suitable for many paperback books and small e-readers, making it a practical addition for book lovers and digital readers alike.
Gauge
Getting the correct gauge is crucial for this project. You should aim for about 18 stitches and 28 rows per 4 inches (10 cm) in seed stitch. When measuring gauge, it’s best to knit a small swatch to test your stitch count before starting your sleeve.
Maintaining the correct gauge ensures your sleeve fits snugly around your books. If your gauge is off, you might find the sleeve too loose or too tight, which could affect its functionality.
Abbreviations
- CO: Cast On
- BO: Bind Off
- K: Knit
- P: Purl
- sts: Stitches
- YO: Yarn Over (if used in variations)
Important Pattern Notes
- Turning chains: In this pattern, turning chains do not count as a stitch.
- Right side / wrong side: Ensure you know the right side of your fabric when seaming.
- Repeat structure: The main rectangle involves alternating rows of knit and purl stitches, a standard pattern for seed stitch.
Understanding these crucial notes can help you avoid common pitfalls throughout the crafting process.
Special Stitches and Techniques
This pattern primarily utilizes the seed stitch, which is worked by alternating between knit and purl stitches on successive rows. It creates a beautiful bumpy texture that provides both visual interest and structural integrity. Here’s a quick overview of how it’s done:
- Row 1: Start by knitting one stitch, then purl one stitch, and continue to repeat across the row.
- Row 2: Alternate this pattern by starting with a purl stitch instead, following by a knit stitch.
Understanding the Construction
The construction begins with a simple rectangle, utilizing the seed stitch technique throughout. Once your rectangle reaches the desired height of approximately 9 inches, it is folded in half vertically, bringing the two side edges together to form a sleeve shape. The bottom edge and one long side are then sewn together to secure the structure.
Full Pattern Instructions
Foundation
- Cast On: Begin by casting on 58 stitches.
Row 1
- Work K1, P1 across the row, repeating from the asterisk.
Row 2
- Work P1, K1 across the row, repeating from the asterisk.
Repeats
Repeat Rows 1-2 until your piece measures about 9 inches, approximately 62-64 rows total.
Bind Off
- Once your rectangle is long enough, be sure to bind off loosely.
Assembly
- Lay the rectangle flat, then fold it in half vertically to bring the two short edges together.
- Seam the bottom edge and one long side using either mattress stitch or whipstitch, ensuring the top remains open.
Button Loop
To create the button loop:
- Create a 3-stitch I-cord about 2.5 inches long, or you may choose to crochet a firm loop from matching yarn.
- Fold the I-cord or loop into shape and sew both ends securely at the inside center of the back top edge.
- Attach the button to the center front, ensuring that the loop can close without excessive tension.
Finishing
- Weave in all ends and block lightly to give your piece a polished look.
- If you wish to resize your sleeve, simply cast on enough stitches to equal twice the desired sleeve width and knit to your preferred height before folding.
Resizing
This project is easily customizable. If you desire a bigger sleeve, determine how much wider you would like the final project to be, then cast on double that amount accordingly, making adjustments to your height as needed.
Useful Variations
Consider these variations to further personalize your sleeve:
- Color Choices: Use a multi-colored yarn or create a two-tone effect by transitioning from one color to another.
- Pattern Adjustments: Add embellishments like embroidery or fabric appliqué for an artistic touch.
Troubleshooting
Why Is My Project Getting Wider?
If your sleeves are becoming too wide, check that you aren’t adding an extra stitch during your transitions.
Why Is My Edge Wavy?
Wavy edges can often be a result of too tight binding off or not maintaining consistent tension.
Why Is My Fabric Curling?
Curling edges often occur if the yarn is too stiff or if appropriate tension is inconsistent throughout.
Frequently Asked Questions
Can I use a different yarn weight?
Yes, opting for a lighter or heavier weight can alter the dimensions but may change the final appearance and functionality.
Can I make it larger?
Certainly! Follow the resizing instructions provided to achieve your desired dimensions.
Do I need a special hook?
No, standard knitting needles will work for this project.
In this way, the Moss Seed-Stitch Book Sleeve is a fulfilling project that can elevate your everyday reading experience. The combination of practical design and enjoyable knitting creates an engaging crafting experience that anyone can appreciate. For more knit-friendly projects, be sure to check out related patterns, including the Butter Yellow Crochet Book Sleeve or the comfortable Alpine Moss One Row Repeat Throw.



