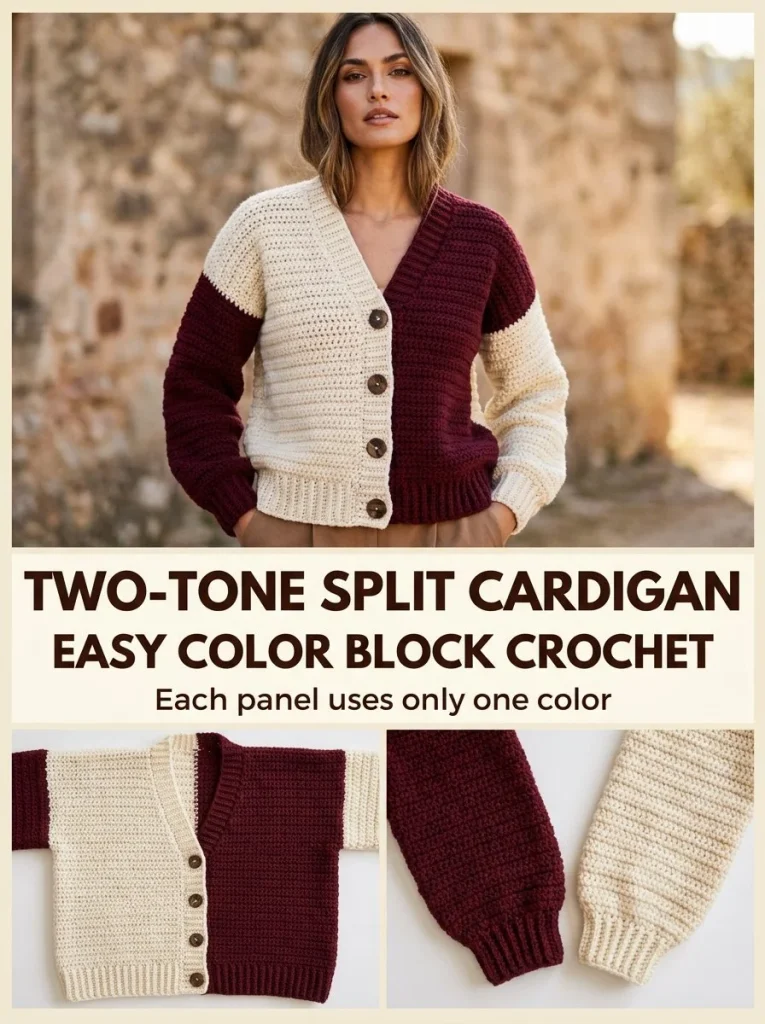
Creating a beautifully crafted Two-Tone Split Crochet Cardigan is a delightful project for those looking to showcase their crochet skills. This pattern allows for personal customization through color choices and sizing, making it perfect for both personal wear and gifts. This cardigan features a striking color-block design that can add a pop of flair to any outfit. Whether you are enjoying a chill day at home or stepping out for a casual outing, this cardigan will keep you cozy and stylish. If you’re interested in making other crochet accessories as well, check out this wrist cuff pattern to complement your look!
Skill Level
This crochet pattern is suitable for confident beginners and intermediate crocheters. While the basic half double crochet stitch is utilized throughout, the technique incorporates color changes and shaping that enhance your skill set.
Materials
For this project, you will need the following materials:
- Worsted-weight #4 yarn in cream and deep burgundy
- 5mm crochet hook
- 4 buttons
- Tapestry needle
- Stitch markers
- Measuring tape
- Gauge approximately 14 hdc = 4 in/10 cm
Abbreviations — US Terms
- ch – chain
- sl st – slip stitch
- hdc – half double crochet
- st(s) – stitch(es)
- sp – space
- ch-sp – chain space
Special Stitches
No unique stitches are used in this pattern, however, the following are essential to know for basic construction:
Half Double Crochet (hdc)
To work a hdc, yarn over, insert your hook into the specified stitch, yarn over again, pull through the stitch (3 loops on your hook), yarn over one last time and pull through all 3 loops.
Gauge
The gauge for this pattern is approximately 14 hdc = 4 inches (10 cm). Ensuring your gauge matches can help in achieving the correct sizing for your cardigan.
Finished Size
The finished size of the cardigan can be adjusted based on the bust measurement, aiming for 4-6 inches of positive ease for comfort.
Pattern Notes
- The cardigan is worked in rows.
- Monitor the color change carefully for the desired effect.
- A pattern of positive ease means you should choose a finished bust measurement that is larger than your actual bust size.
- Stitch markers will be handy to mark the beginning and end of rows or specific sections.
Crochet Instructions
The crochet instructions are divided into several logical parts for clarity: back panels, front panels, sleeves, and final assembly.
Back Panels
- Determine Your Size: Choose your finished bust measurement, ensuring it aligns with the 4-6 inches of positive ease.
- Divide the Back Width: Measure the required back width and divide it in half.
- Work the Cream Panel:
- Chain: Make a foundation chain of a length that matches half of your determined back width.
- Row 1: Hdc in the third chain from the hook and each remaining chain across.
- Turn: Ch 2 to start the next row, making sure this turning chain does not count as a stitch.
- Row 2-N: Repeat hdc across for the desired length of the cardigan, ending with total stitch counts being the same each row.
- Work the Burgundy Panel: Repeat the same process as the cream panel, ensuring it measures the same length.
Joining the Back Panels
- Align the Panels: Place the cream and burgundy panels with their long edges aligned.
- Joining: Use a slip stitch or whip stitch to join along the long center-back edges neatly.
Front Panels
- Work the Cream Front Panel:
- Chain: Create a foundation chain equal to the width of your front panel.
- Row 1: Hdc into the third chain from the hook and across, as done for the back.
- Row 2-N: Continue hdc for the total length desired.
- Work the Burgundy Front Panel: Follow the same steps as for the cream front panel until completion.
- Shape Inner Neckline:
- Start by marking where your neckline will begin (suggested width is about 3-4 inches).
- V Decrease: To create the mirrored V decreases, work to the marked spot, hdc into the stitch before the marker, and skip the marker stitch to complete the decrease. Work hdc until you reach the end of the row.
Sleeves
- Work the Cream Sleeve:
- Chain: Make a chain equivalent to the desired width of the sleeve plus 2 for turning.
- Row 1: Row of hdc across.
- Rows 2-N: Maintain the same count throughout, increasing slightly towards the body end if necessary.
- Repeat for the Burgundy Sleeve: Follow the same instructions as for the cream sleeve.
Assembly
- Joining the Sleeves:
- Attach: Sew the burgundy sleeve to the cream side of the body and vice versa. This creates the contrasting color effect.
- Finishing Touches:
- Ribbing: Create solid-color ribbing at cuffs and lower hem using the same yarn color as each respective section.
- Front Band: Work a neutral dark or alternating front band around the opening, ensuring to create 4 buttonholes evenly spaced out.
- Buttons: Sew 4 dark buttons opposite the buttonholes.
Tips for the Best Result
- Use stitch markers extensively to keep track of your color changes.
- Maintain consistent tension to ensure even fabric throughout.
- Block your finished garment for a professional look, especially if fabric tends to curl.
- If unsure about button placements, play around with pinning before sewing for the best alignment.
Common Mistakes
Uneven Panels
This can occur if you change tension midway; ensure you maintain uniform tension throughout.
Misaligned Seams
Keep an eye on the panel placements before sewing to avoid patchy appearance.
Enhancing your crochet skills while creating this cardigan can lead to many rewarding outcomes. Explore different color combinations to personalize your wardrobe! After mastering this pattern, you might be interested in creating matching accessories, such as this cute bag charm to complete your outfit.



