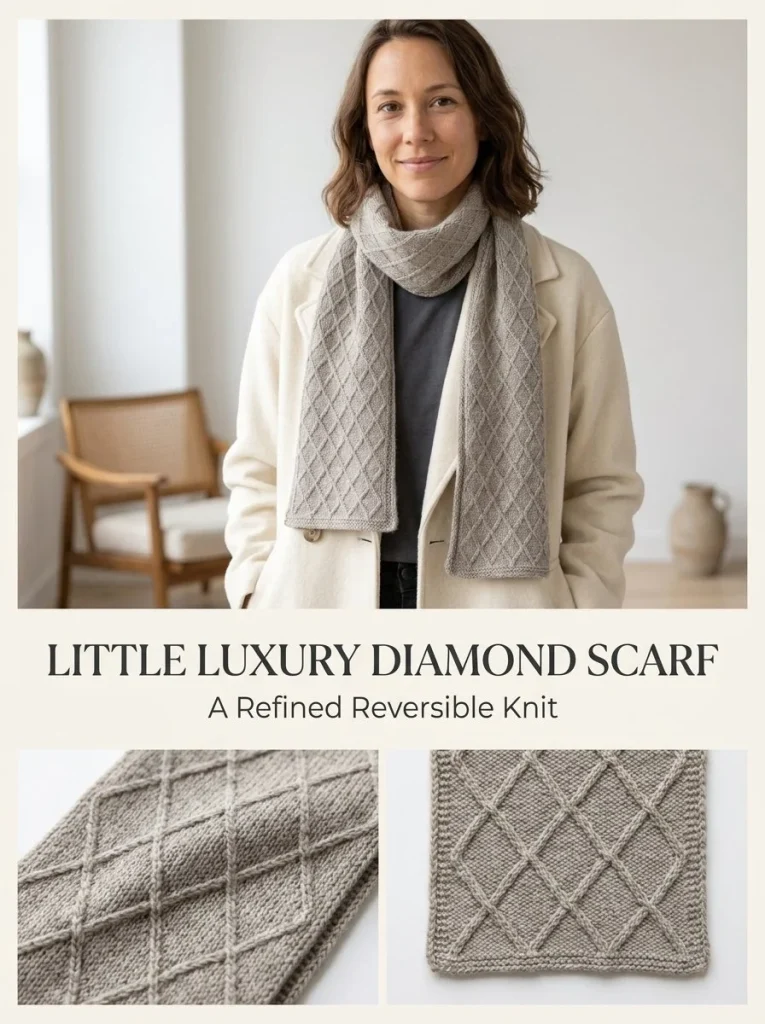
The Little Luxury Reversible Diamond Scarf is a delightful project that combines elegance with practicality. This scarf is perfect for snuggling up during chilly weather while also showing off your knitting skills. The unique diamond pattern gives it a sophisticated look, while the reversible design allows you to enjoy two beautiful sides. For those interested in other stunning scarf designs, check out this autumn color block chunky scarf knitting pattern for inspiration.
Skill Level
This pattern is suitable for intermediate knitters. You should be comfortable with basic knitting techniques such as casting on, knitting, purling, and binding off. A knowledge of reading knitting patterns will also be helpful since the instructions include specific row-by-row guidance.
Materials
To complete this scarf, you will need the following materials:
- 400–500 yd / 366–457 m fingering or light sport merino/cashmere yarn in greige
- US 4 / 3.5 mm knitting needles
- Stitch markers
- Tapestry needle
- Scissors
Abbreviations — US Terms
- st(s) – stitch(es)
- RS – right side
- WS – wrong side
- k – knit
- p – purl
Special Stitches
Slip Stitch (for the edge)
To create a neat edge, you will slip the first stitch purlwise with the yarn in front on every row. This technique helps produce an even selvage, making your scarf look polished.
Gauge
Gauge is not strictly essential for this project; however, maintaining consistent tension is vital for achieving the best possible appearance in your scarf. Make sure to check that your stitches are neither too tight nor too loose.
Finished Size
When completed, the scarf will measure approximately 57 in / 145 cm in length. You can easily adjust its length by working more or fewer repeats of the pattern.
Pattern Notes
- This scarf is worked in rows, back and forth.
- The pattern consists of a repeating 8-stitch by 12-row sequence.
- Use stitch markers to mark the beginning of the pattern repeat for easier navigation.
- The yarn should be wet-blocked gently to open up the diamond shapes while maintaining the scarf’s width. There should be no fringe or tassels on the finished piece.
Crochet Instructions
Cast On
Begin by casting on 44 stitches using your preferred cast-on method. Ensure that you have a loose and even tension for comfortable stretching in the finished scarf.
Row 1 (RS)
- Slip the first stitch purlwise with the yarn in front.
- Knit 1, then purl 3; repeat this sequence (k1, p3) until you reach the last stitch.
- Knit the last stitch.
Total: 44 sts
Row 2 (WS)
- Slip the first stitch purlwise with the yarn in front.
- Continue to work each stitch as it appears.
Total: 44 sts
Row 3
- Slip the first stitch purlwise with the yarn in front.
- Purl 1, knit 1, purl 1 five times (p1, k1, p1, p1, p1, k1, p1, p1).
Total: 44 sts
Row 4 (WS)
- Slip the first stitch purlwise with the yarn in front.
- Work each stitch as it appears.
Total: 44 sts
Row 5
- Slip the first stitch purlwise with the yarn in front.
- Purl 2, knit 1, purl 1, purl 2, knit 1, purl to the end of the row.
Total: 44 sts
Row 6 (WS)
- Slip the first stitch purlwise with the yarn in front.
- Work each stitch as it appears.
Total: 44 sts
Row 7
- Slip the first stitch purlwise with the yarn in front.
- Repeat the sequence from Row 5.
Total: 44 sts
Row 8 (WS)
- Slip the first stitch purlwise with the yarn in front.
- Work each stitch as it appears.
Total: 44 sts
Row 9
- Slip the first stitch purlwise with the yarn in front.
- Repeat the sequence from Row 3.
Total: 44 sts
Row 10 (WS)
- Slip the first stitch purlwise with the yarn in front.
- Work each stitch as it appears.
Total: 44 sts
Row 11
- Slip the first stitch purlwise with the yarn in front.
- Repeat the sequence from Row 1.
Total: 44 sts
Row 12 (WS)
- Slip the first stitch purlwise with the yarn in front.
- Work each stitch as it appears.
Total: 44 sts
Repeat Rows
Continue to repeat Rows 1–12 until your scarf measures approximately 57 in / 145 cm in length, ensuring you end after Row 12.
Bind Off
Once you have reached your desired length, bind off loosely in pattern. Use a tapestry needle to weave in any loose ends invisibly.
Blocking
To finish, wet-block gently to open up the diamond shapes in the scarf while keeping it narrow. This step ensures a refined and professional finish.
This scarf not only serves as a stylish accessory but also showcases your knitting abilities. If you’re interested in exploring other knitting patterns that offer a beautiful touch, consider trying the acorn brown keyhole scarf knitting pattern. Happy knitting!



