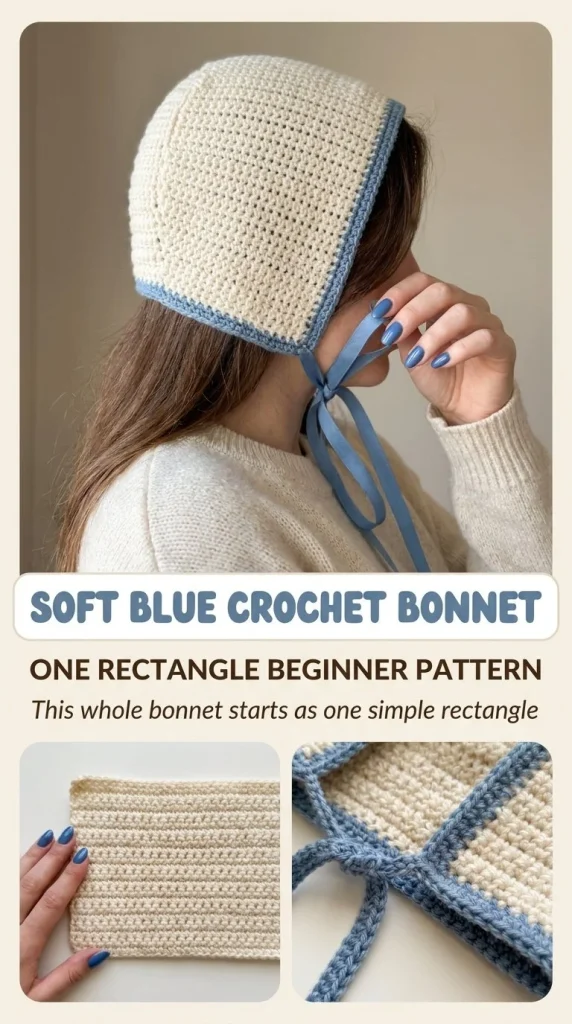
Crochet lovers always find joy in creating beautiful and functional pieces, and the soft blue crochet bonnet is no exception. This beginner-friendly pattern not only introduces new crocheters to essential techniques but also produces a charming accessory perfect for any little one. Plus, if you’re looking for more beginner projects, consider checking out this simple blue bucket hat pattern to expand your crochet skills!
Skill Level
Beginner
This project is perfect for beginners due to its straightforward construction and minimal stitch variety, helping new crocheters gain confidence and experience.
Materials
- Soft worsted cream yarn
- Small amount of dusty-blue yarn
- 5mm crochet hook
- Tapestry needle
- Scissors
- Measuring tape
Abbreviations — US Terms
- ch – chain
- sl st – slip stitch
- sc – single crochet
- st(s) – stitch(es)
Special Stitches
For this pattern, only basic stitches are necessary. You will primarily use the single crochet stitch throughout.
Gauge
Gauge is not essential for this pattern; however, aim for consistent tension to ensure your bonnet fits well.
Finished Size
The bonnet will measure approximately 10-11 inches wide and 8-9 inches tall. Adjustments can be made for fit by adding or removing rows as needed.
Pattern Notes
- The bonnet is worked in rows.
- The foundation chain is important for achieving the correct width.
- This project involves simple stitches and easy finishing techniques.
- The rectangle is folded and sewn to form the bonnet, leaving an unseamed face opening.
Crochet Instructions
Starting the Rectangle
- With the cream yarn, make a foundation chain of 31 stitches.
- Row 1: Starting in the second chain from the hook, make 1 single crochet (sc) in each chain across. You will have a total of 30 stitches after completing this row.
Continuing the Rectangle
- Row 2: Chain 1, turn your work, and sc in each stitch across (30 sc).
- Rows 3-24: Repeat Row 2 for a total of 23 additional rows. At this point, your rectangle should measure roughly 10-11 inches in width and 8-9 inches in height.
Shaping the Bonnet
- Once you have completed the rows, fold the rectangle in half so that the shorter edges meet.
- Using your tapestry needle, sew approximately 5-6 inches along one edge to form the back of the bonnet, leaving the face opening unseamed.
- Turn the bonnet right-side out to prepare for the finishing touches.
Adding the Neckline and Ties
- Join the dusty blue yarn at one lower corner of the face opening. Work evenly spaced sc stitches around the entire perimeter of the opening and along the lower edge.
- At each lower front corner, chain 45-55 stitches to create ties, then slip stitch back along the chain to ensure it’s firmer and more secure.
Finishing
- Fasten off your yarn and weave in any ends using the tapestry needle. This will give your bonnet a clean, polished look.
How to Resize
If you’d like to adjust the size of the bonnet, simply add or remove rows from the rectangle while ensuring that the width remains consistent with the foundation chain of 31 stitches.
Color Variations
Feel free to play with different colors by substituting the cream and dusty blue for other shades. Pastel colors could create a softer look, while bold colors might make a striking statement.
Yarn and Hook Tips
It’s beneficial to use soft, washable yarn for projects intended for babies. This will ensure comfort and make cleaning easier for parents.
Tips for the Best Result
- When folding the rectangle, make sure the edges align perfectly to maintain evenness.
- Count your stitches regularly to avoid any discrepancies in sizing.
- Use stitch markers to indicate the beginning of your rows if needed.
Common Mistakes
Uneven Sizing
Make sure to count your stitches and rows carefully to avoid an improperly sized bonnet. This commonly happens if some stitches are skipped unintentionally.
Loose Ties
When making the ties, ensure that you’re slip stitching back along the chain as this will create a tighter and sturdier tie.
By following these detailed instructions, you’ll craft a lovely crochet bonnet that’s sure to be cherished. Enjoy your crocheting journey, and consider pairing this beautiful bonnet with a matching cherry blossom crochet hair comb pattern for a delightful set! Happy crocheting!



