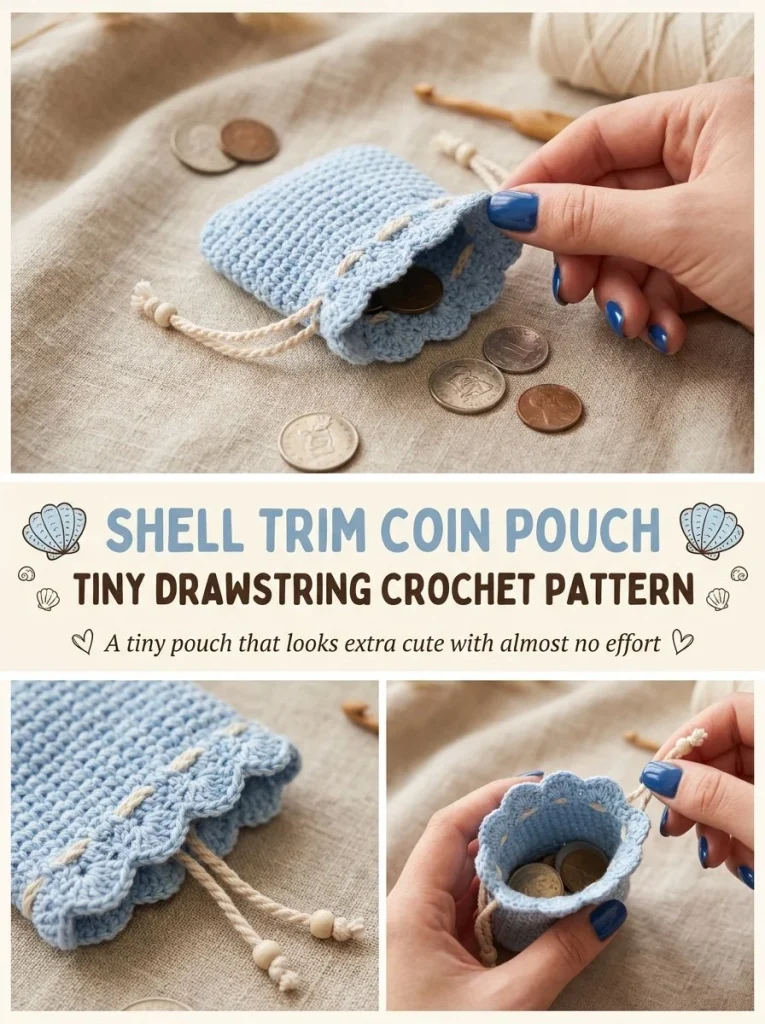
Crocheting a Shell Trim Coin Pouch is not only a fun project but also a practical way to store small items like coins, jewelry, or craft supplies. This tiny drawstring pouch is perfect for gifting or personal use, and its delicate shell trim adds a touch of charm to the finished piece. For beginners, the straightforward construction and simple stitches make this project a great introduction to crochet. As you work through the pattern, keep in mind that a tight tension will help the pouch maintain its shape better, ensuring it looks polished and professional.
Why You’ll Love This Crochet Pattern
- It creates a cute and functional pouch that’s great for organizing small items.
- The project is quick to complete, making it perfect for last-minute gifts.
- The shell trim provides an opportunity to practice decorative stitches.
- It’s beginner-friendly, with easy-to-follow steps for every crocheter.
- Using just a small amount of yarn makes this an economical project.
Finished Size
This pouch will be approximately 4 inches wide and 6 inches tall when completed. Keep in mind that size may vary depending on your yarn, hook, and tension.
Skill Level
This pattern is suitable for beginner crocheters. The straightforward stitches and simple construction steps make it an excellent choice for those new to crochet.
Materials Needed
- Pale-blue cotton yarn (light weight)
- 3mm crochet hook
- Tapestry needle
- Scissors
- Stitch markers (optional)
- Chain (or ribbon) for drawstring
Stitches and Abbreviations
- ch: chain
- sc: single crochet
- dc: double crochet
- sl st: slip stitch
Gauge and Tension Notes
Gauge isn’t critical for this project, but maintaining an even tension is essential. If your stitches are too tight, the pouch may not close properly. If they are too loose, the shape may sag.
Pattern Notes Before You Start
This coin pouch is worked in rows, and the panels are seamed together to form the pouch. The top shell trim is added last, creating a decorative finish. Be cautious when working the shells; ensure that you skip the correct stitches for evenly spaced shells.
Step-by-Step Crochet Instructions
- Pouch Body: Start by chaining 13.
- Row 1: Work 1 single crochet in the 2nd chain from the hook and continue across for a total of 12 stitches.
- Rows 2-10: Chain 1, turn your work, and single crochet across. Fasten off, leaving a tail for seaming.
- Seaming: Fold the rectangle in half and seam the side edges together to form a pouch.
- Shell Trim: Join the yarn at the top edge of the pouch. Work small shells evenly around the opening following this pattern: skip 1 stitch, 5 double crochets in the next stitch, skip 1 stitch, slip stitch in the next stitch as spacing allows.
- Drawstring: Chain 35, fasten off, and weave it through the top row just below the shell trim. Pull to close and knot the ends.
Assembly and Finishing
After completing the crochet, weave in all the ends. To shape the pouch, gently stretch it to ensure the sides are even. Ensure the shell trim is neatly aligned and the drawstring weaves smoothly through for ease of use.
Helpful Tips
- Use a stitch marker to keep track of your rows.
- For a more structured look, consider using a cotton blend that holds its shape well.
- If you’re struggling with the shell stitch, try practicing it on a swatch first.
- Weave your ends carefully to avoid any unraveling.
Common Mistakes to Avoid
- Skipping Stitches: Make sure to skip stitches correctly when working the shell trim to maintain a consistent look.
- Uneven Tension: Monitor your tension so that the sides of the pouch are even and balanced.
- Too Tight Drawstring: If the cord is too tight, it may be difficult to pull closed. Test your drawstring before cutting the yarn.
Customization Ideas
- Change the color of the yarn for seasonal variations; pastel shades work beautifully for spring, while rich jewel tones suit winter.
- Add beads or charms to your drawstring for a personal touch.
- Experiment with different stitch combinations for the shell trim for a unique look.
How to Use or Display This Crochet Project
The finished pouch can be used to hold coins, jewelry, or even as a small gift bag. It’s also lovely when displayed on a dresser or shelf, adding a cozy touch to any room.
Care Instructions
To clean your pouch, hand wash with mild soap and lay flat to dry. Store it in a dry place to maintain its shape and avoid any moisture damage.
Frequently Asked Questions
Q: Can I use a different yarn type?
A: Yes, just ensure it is of similar weight for the best results.
Q: What can I use this pouch for?
A: It’s perfect for holding coins, small gifts, or craft supplies.
Q: How can I make it larger?
A: Simply chain more at the beginning and adjust the number of rows accordingly.
Q: Is it okay to crochet tightly?
A: While tight stitches can give a neat look, excessively tight crochet may affect the pouch’s shape and usability.
Q: Can I add a lining to the pouch?
A: Certainly! Adding a fabric lining can enhance durability and give your pouch a unique flair.
Crocheting your own Shell Trim Coin Pouch is a delightful project that can showcase your skill while being immensely practical. For those interested in expanding their crochet repertoire, check out the Chartreuse Mosaic Coin Charm pattern for another fun creation. Or, if you’re in the mood for something different, the Crochet Tiny Hedgehog Needle Book may inspire your next crafting session!



