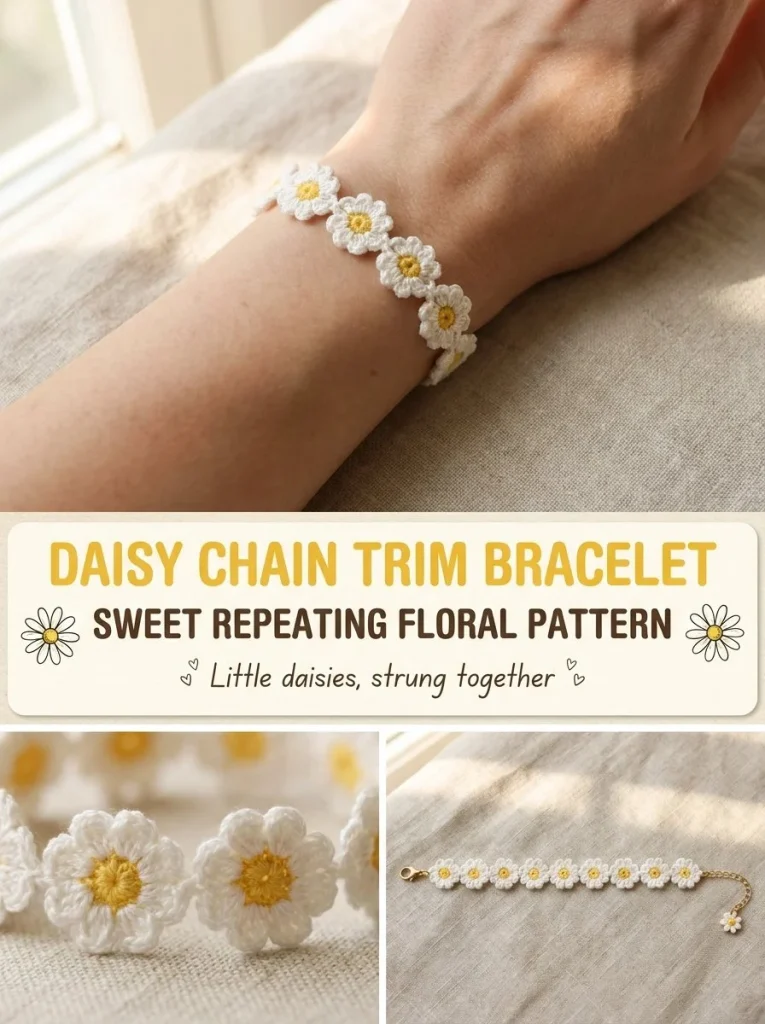
Crocheting a Daisy Chain Trim Bracelet is a delightful project that combines playful floral motifs with a practical accessory. This charming bracelet features interconnected daisies, making it a lovely addition to your jewelry collection or a thoughtful gift for a friend. What makes this pattern especially accessible is its beginner-friendly approach, allowing even those new to crochet to achieve beautiful results. As you work through the petals, you’ll find that small adjustments in tension can significantly enhance the neatness of your finished piece.
Why You’ll Love This Crochet Pattern
- Easy-to-follow steps perfect for beginners and intermediates alike.
- Playful floral design that adds a whimsical touch to any outfit.
- Quick to crochet, making it a lovely last-minute gift or personal accessory.
- Flexible in style, as you can use any color scheme that suits your taste.
- A fantastic way to practice essential crochet skills like the magic ring and chain stitches.
Finished Size
The estimated finished size of the bracelet is approximately 7 to 8 inches, which can be adjusted by adding or removing daisies. Keep in mind that the final size may vary depending on your yarn, hook, and tension.
Skill Level
This pattern is suitable for beginners with a basic understanding of crochet techniques. The use of simple stitches like chains and double crochet ensures that you can create this beautiful bracelet without feeling overwhelmed.
Materials Needed
- Fine white cotton thread
- Yellow thread for centers
- 1.5mm steel crochet hook
- Small lobster clasp
- Tapestry needle
- Scissors
Stitches and Abbreviations
- ch: chain
- dc: double crochet
- sl st: slip stitch
Gauge and Tension Notes
While gauge isn’t crucial for this project, maintaining consistent tension will help your daisies look their best. Aim for a tight enough tension to hold the shape without being overly constricting.
Pattern Notes Before You Start
This bracelet is worked in rounds to create separate daisy motifs that are connected by chains. As you make each daisy, remember that you’ll be leaving a tail to weave in later, so don’t cut your yarn until the very end. Color changes occur in the center stitch where you’ll attach the yellow thread.
Step-by-Step Crochet Instructions
- Start with a magic ring.
- Chain 1, then work ch2, dc1, ch2, sl st into ring five times to form five petals.
- Without fastening off, chain 3 to bridge to the next flower.
- Repeat the magic-ring daisy pattern directly, connecting it to the previous chain.
- Continue connecting daisies until the chain reaches your desired wrist length.
- Fasten off, leaving a tail for weaving.
- With yellow thread, stitch a small French-knot center into each daisy.
- Attach the lobster clasp to one end and a small loop to the other end for closure.
- Weave in all remaining ends for a neat finish.
Assembly and Finishing
To ensure your bracelet maintains its shape, gently block the daisies as needed using a light steam. Weave in all ends carefully to prevent any unsightly bits from peeking out. This will keep your finished bracelet looking polished and professional.
Helpful Tips
- To improve the neatness of each petal, try to keep your tension consistent throughout the project.
- If your flowers are flaring out, consider using a smaller hook size to tighten the stitches.
- Remember, practice makes perfect—don’t be discouraged if your first few daisies need tweaking!
- Experiment with various colors to create a unique bracelet that matches any outfit, similar to how you can make a rosebud bracelet for a different style.
Common Mistakes to Avoid
- Not securing your magic ring tightly can lead to gaps in the center of your daisies.
- Forgetting to attach the yarn for the yellow centers until after completing the daisies can complicate finishing.
- Working too loosely can cause the daisy petals to distort, affecting the overall look of your bracelet.
Customization Ideas
- Change the thread colors for seasonal variations—think pastels for spring or deeper tones for fall.
- Adjust the size by adding or subtracting daisies, making it suitable for children, adults, or even as a choker.
- Add beads or sequins in the center for a bit of sparkle and personality.
How to Use or Display This Crochet Project
The Daisy Chain Trim Bracelet can be worn on its own or stacked with other bracelets for a trendy, layered look. It makes a thoughtful gift for birthdays or special occasions, demonstrating care and creativity.
Care Instructions
To clean your finished bracelet, gently hand wash it in cool water with a mild soap. Lay it flat to dry and avoid exposing it to direct sunlight, which could cause fading.
Frequently Asked Questions
Q1: Can I use thicker yarn for this pattern?
A1: Yes, but be mindful that a larger yarn will result in a bulkier bracelet.
Q2: What can I substitute for the lobster clasp?
A2: You could use a toggle clasp or even a simple knot if you prefer a more casual look.
Q3: How do I adjust the size for younger children?
A3: Simply shorten the chain length by reducing the number of daisies.
Q4: Is it possible to make the daisies different colors?
A4: Absolutely! You can mix and match colors for a vibrant approach.
Q5: How long will it take to complete this bracelet?
A5: It usually takes about an hour to complete, depending on your skill level and speed.
With this pattern, you’ll not only create a beautiful piece of jewelry but also enhance your crochet skills. Dive into this fun project and enjoy the process of crafting each lovely daisy. For more fun projects, check out the Chunky Boucle Cloud Bracelet for a soft, textured alternative!



