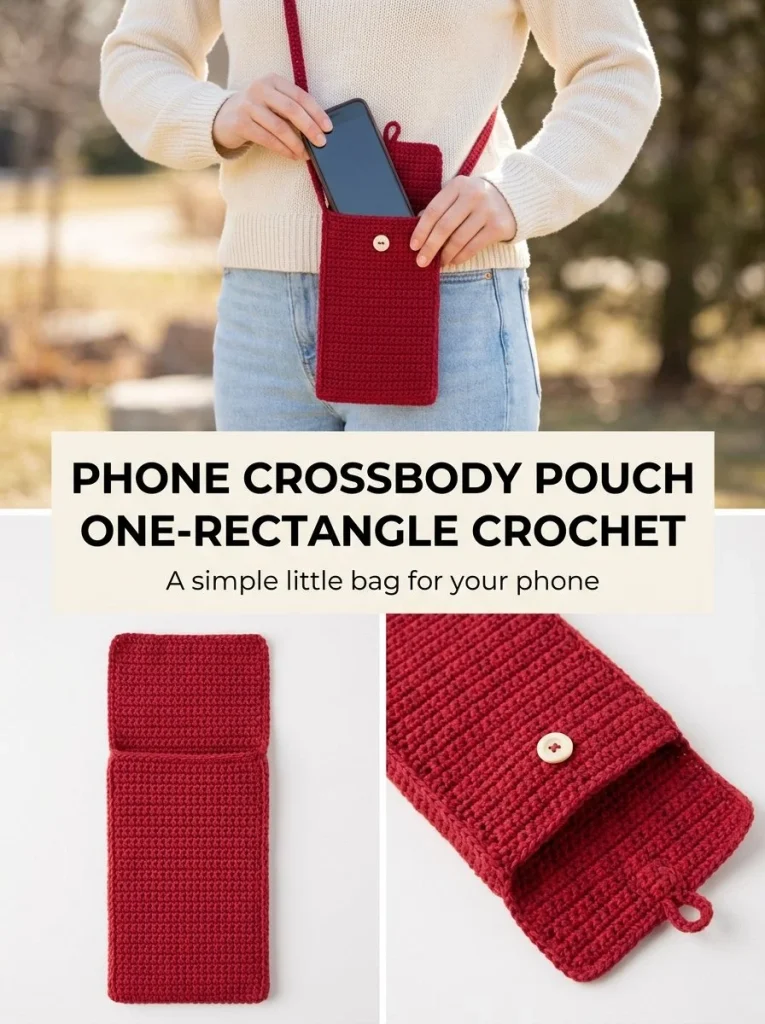
This charming Cherry Red Phone Crossbody Pouch is an excellent project for crochet enthusiasts looking to create a stylish, functional accessory. Perfect for those on the go, this pouch cleverly combines simplicity and elegance, with its one-rectangle construction making it straightforward for both beginners and experienced crocheters. The vibrant cherry red color not only adds a pop of fun but also allows for versatile styling with various outfits.
In this project, you will learn the fundamental techniques of single crochet, along with how to measure and fit your pouch to your smartphone. Once completed, this crossbody pouch allows for hands-free convenience while carrying your phone and can easily be customized to your personal style, whether through color adjustments or added embellishments. For additional themed accessories, consider creating a matching bag charm by following this simple textured pattern.
Pattern at a Glance
- Skill level: Easy
- Terminology: US terminology
- Construction: One-piece rectangle
- Finished size: Approximately the width of the phone plus 0.75-1 in and a height of around 18 in including the flap
- Yarn weight: Worsted-weight #4 cotton
- Hook: 4.5mm
- Main stitch: Single crochet
- Gauge: Approximately 15 sc = 4 in/10 cm
- Motifs: None
- Layout: Rectangle folded and seamed
- Joining: Seamed edges
- Border: None
Materials
To create the Cherry Red Phone Crossbody Pouch, gather the following materials:
- Yarn: Worsted-weight #4 cotton yarn in cherry red
- Hook: 4.5mm crochet hook
- Button: 1 small cream button
- Needle: Tapestry needle for weaving in ends
- Gauge: Approximately 15 single crochets = 4 in/10 cm
The yarn’s weight is crucial for the pouch’s durability and aesthetic, providing both a tidy finish and structural integrity. The small button serves as a closure, adding functionality to the design.
Yarn and Color Notes
Choosing the right yarn is essential for achieving the desired drape and finish in this project. A cotton yarn has the right balance of sturdiness and softness, making it perfect for a crossbody pouch that holds essential items. Additionally, the cherry red color is vibrant and eye-catching, ensuring that your pouch stands out.
If you’re considering alternative color schemes, think about using a classic neutral base with splashes of your favorite colors for accents. Solid colors work particularly well in this project, but variegated yarn can also yield unique results.
Finished Measurements
The finished dimensions of the pouch should measure approximately 0.75-1 in wider than your phone and around 18 in in length, allowing enough height to form a flap that comfortably covers the phone. To ensure correct sizing, measure your phone first and adjust your starting chain accordingly.
Gauge
It is vital to check your gauge before starting the project. To measure your gauge, crochet a swatch of 15 single crochets over approximately 4 inches. If your gauge is larger than specified, you may consider using a smaller hook. Conversely, if it is smaller, opt for a larger hook. Remember, maintaining the correct gauge is especially important to ensure that the pouch fits your phone properly.
Abbreviations
- ch – chain
- sc – single crochet
- sl st – slip stitch
Important Pattern Notes
- When starting with chains, always remember to begin with the second chain from the hook for your first single crochet.
- The turning chain does not count as a stitch, so be sure to adjust your counting accordingly.
- This pattern is designed to be worked in flat rows which you will then seam to create the pouch, rather than in the round.
- Ensure your stitches are consistent to avoid any unevenness.
Special Stitches and Techniques
In this project, you will primarily be using the single crochet stitch. This stitch is straightforward and ideal for creating a tight, dense fabric that helps the pouch maintain its shape while providing adequate protection for your phone.
Understanding the Construction
The pouch is constructed from a single rectangle that is folded to form the pouch itself. This method simplifies the construction process, making it suitable for beginners. After crocheting the rectangle, you will fold it to create the body and flap.
Key Construction Steps:
- Crochet a long rectangle using single crochet stitches.
- Fold the bottom section upwards, ensuring it’s taller than the phone for the flap.
- Seam both side edges to enclose the phone securely.
- Create a loop for the button closure at the flap.
Full Pattern Instructions
Foundation
- Measure your phone’s width and create a starting chain to ensure that the finished pouch will be approximately 0.75-1 in wider than your phone. For many smartphones, this will be 18 chains or enough for 4.5-5 in.
Row 1
- In the second chain from the hook, single crochet (sc) across the chain.
- Turn your work.
Continuing Rows
- Continue to work sc rows until the rectangle measures approximately 18 in or enough for twice the height of your phone plus a 3-4 in flap.
- At this stage, make sure your piece lies flat and that there are no skipped stitches.
Folding and Seaming
- Once your rectangle is the correct length, fold the lower section upwards until it is slightly taller than your phone.
- Seam both side edges using a whip stitch or slip stitch, ensuring your edges are even and secure.
Creating the Flap
- Fold the remaining section down over the pocket to form the flap.
- Secure the button to the front center of the pouch.
Button Loop
- At the edge of the flap, join your yarn and chain 6-10 to fit the button snugly.
- Slip stitch back to the flap to create a loop.
Strap
- Chain to your desired crossbody length, typically between 44-50 in.
- To ensure strength, slip stitch or single crochet back across the chain.
- Securely sew both strap ends to the upper side edges of the pouch.
Checkpoints
- Your pouch should now measure approximately 18 in in length and be the width of your phone plus 0.75-1 in.
- Ensure the side seams are tight without any gaps.
- Confirm that the button closure aligns correctly when you fold the flap down.
Assembly
As this project consists mostly of single pieces, assembly is straightforward:
- Seam the edges securely to avoid any gaps.
- Align the flap and secure the button for a finished edge.
Finishing
After assembly, weave in any loose ends with your tapestry needle for a clean finish. You may wish to block your pouch gently, ensuring that all edges are smooth.
Resizing
To make adjustments for a larger or smaller phone, modify the starting chain appropriately. If you need more or fewer rows, simply adjust the overall length according to your phone’s dimensions while maintaining the necessary proportions for flap coverage.
Variations
Consider adding decorative elements like embellishments or other charms to personalize your pouch. A simple way to enhance its charm is to create a matching accessory using this cute crochet accessory pattern.
Troubleshooting
Why Is My Pouch Too Tight?
If your pouch is too snug for your phone:
- Check your gauge and consider using a larger hook for looser stitches.
- Ensure you haven’t unintentionally added extra stitches.
Why Is My Fabric Curling?
If edges are curling:
- Add some blocking to straighten the edges.
- Make sure stress on stitches is evenly distributed.
Frequently Asked Questions
Can I use different yarn types?
Absolutely! However, keep in mind that changing fiber types may affect the final look and durability.
Can I make the strap longer?
Yes! Simply adjust the chain length for the strap according to your preference.
Is this beginner-friendly?
Yes! The pattern is straightforward and ideal for those who are new to crocheting.
Can I use two colors?
Both solid and variegated colors work wonderfully, allowing for unique personal styles.
Final Thoughts
Creating your Cherry Red Phone Crossbody Pouch is a fun project that combines practicality with stylish elegance. The construction method, a simple rectangular design, makes it perfect for beginners and offers plenty of room for personal expression. Whether you keep it simple or add fun embellishments, this pouch will surely enhance your crochet collection!



