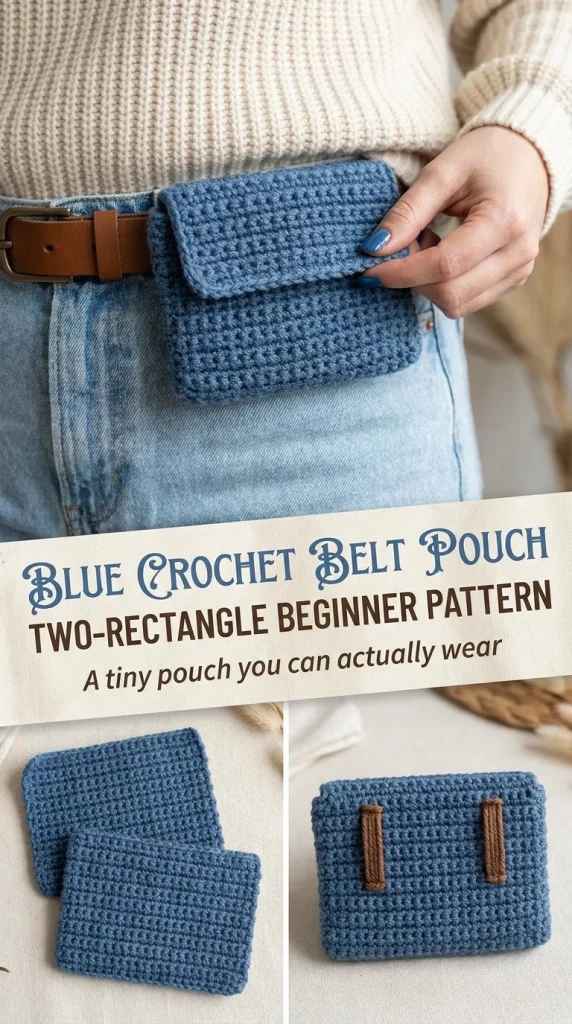
Crochet enthusiasts will love creating this simple yet stylish Blue Crochet Belt Pouch. This beginner-friendly project blends functionality with a touch of style, making it perfect for holding essentials while on the go. If you’re looking to experiment with crochet patterns, this pouch serves as an excellent introduction to basic stitches and construction techniques. If you’re interested in more beginner patterns, check out this beginner-friendly bucket hat crochet pattern for inspiration.
Skill Level
Beginner. This project only requires basic crochet skills such as chains, single crochets, and slip stitches, making it accessible for those new to the craft.
Materials
- Denim-blue cotton yarn
- 4mm crochet hook
- Tapestry needle
Abbreviations — US Terms
- ch – chain
- sl st – slip stitch
- sc – single crochet
- st(s) – stitch(es)
Special Stitches
No special stitches are needed for this pattern, as it predominantly uses foundational crochet techniques.
Gauge
Gauge is not critical for this project, but it’s important to maintain consistent tension throughout.
Finished Size
The finished size of the pouch will depend on your tension, but the base pouch measures approximately 6 inches in width and 5 inches in height when completed.
Pattern Notes
The project is worked in rows. You will create two rectangular panels that form the front and back of the pouch. Make sure to leave the top open when assembling, allowing for easy access. The design features belt loops that allow the pouch to be affixed to a belt, providing a hands-free carrying option.
Crochet Instructions
Part 1 – Panels
You will start by creating two identical panels.
Row 1
- Begin by making a foundation chain of 15 chains.
- In the second chain from the hook, work 1 sc (single crochet) and continue to work 1 sc in each chain across the row.
- You should have 14 sc at the end of this row.
Row 2
- Chain 1 to start the new row.
- Turn your work to access the back side.
- Work 1 sc in each of the 14 st.
- At the end of the row, you will again have 14 sc.
Rows 3–12
Repeat Row 2 for a total of 11 more rows (for a stacked total of 12 rows).
After completing all rows for both panels, fasten off the yarn and weave in the ends using a tapestry needle.
Part 2 – Assembling the Pouch
- Place the two panels together, aligning them.
- Using a tapestry needle, sew or slip stitch down one side, across the bottom, and up the other side, leaving the top open. Focus on making your seams neat and evenly spaced for a polished finish.
Part 3 – Belt Loops
You will create two belt loops to attach to the back panel.
- For each loop, chain 7.
- In the second chain from the hook, work 1 sc and then sc across the remaining chains (you will complete 6 sc).
- Fasten off, leaving a tail for sewing.
Sew one strip vertically to each side of the back panel, attaching only the top and bottom ends. This will create a functional loop allowing a belt to slide behind each strip.
Finishing Touches
Once the pouch is fully assembled, take a moment to weave in any loose ends from your panels and belt loops. This is crucial as it ensures a clean and sturdy pouch.
Tips for the Best Result
- When working the single crochet rows, maintain even tension to ensure that all rows appear consistent.
- Use stitch markers at the beginning of each row if needed, especially if you are new to counting rows.
- Check your seams for snugness to avoid any gaps where items could fall out.
Common Mistakes
Uneven Stitch Count
One common issue for beginners is changing stitch counts mid-project. Make sure to maintain consistency by counting your stitches at the end of each row.
Loose Seams
Be mindful of your tension when sewing the panels together; loose seams can cause the pouch to unravel.
Considering that this pattern focuses on simple techniques, it also offers a great foundation for trying out more complex projects in the future. If you’re feeling adventurous and want to diversify your crochet skills, consider working on other small projects like a hair comb pattern, such as this beginner-friendly cherry blossom crochet hair comb pattern.
Care
The cotton yarn used for this pouch is machine washable but check the yarn label for specific care instructions. Do not iron, and avoid bleach. Lay flat to dry to maintain shape.
With this detailed guide, you’re all set to create your very own Blue Crochet Belt Pouch. Enjoy your crocheting journey!



