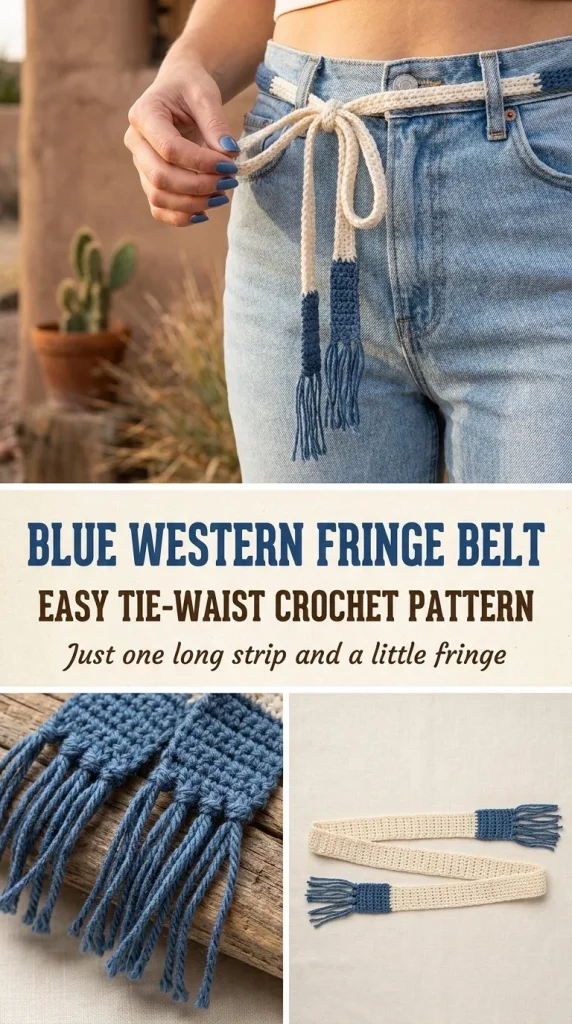
The Blue Western Fringe Tie Belt is a delightful and stylish accessory that adds a fun touch to any outfit. Whether you’re looking to enhance your wardrobe or create a unique gift, this crochet project is perfect for you. Designed for ease, this pattern allows you to utilize basic crochet skills and enjoy the satisfaction of making something special. If you love adding cute accessories to your collection, you might also consider exploring other crochet projects, such as a charming bag charm or a trendy hair accessory.
Skill Level
This pattern is categorized as a Confident Beginner project. It is well-suited for those who have basic knowledge of crochet techniques, including chaining and single crochet stitches. You will find the steps straightforward, but they do require some familiarity with crochet terms and techniques.
Materials
To create the Blue Western Fringe Tie Belt, gather the following materials:
- Cream cotton or worsted yarn
- Denim-blue yarn
- 4mm crochet hook
- Tapestry needle
- Scissors
- Measuring tape
Abbreviations — US Terms
- ch – chain
- sc – single crochet
Special Stitches
This pattern primarily uses the single crochet stitch, which is a fundamental stitch in crochet.
Gauge
Gauge is not essential for this project. However, maintaining consistent tension will help ensure your belt has a uniform appearance.
Finished Size
The finished size of the belt can be adjusted based on your preference. For a comfortable fit, you will be creating a foundation chain that wraps around your waist.
Pattern Notes
- The belt is worked in rows.
- The initial foundation chain will determine the overall size of the belt.
- This pattern does not include joining rounds, making it simpler for beginners.
- Fringe is added at the ends for decoration.
Crochet Instructions
Follow the detailed steps below to complete your Blue Western Fringe Tie Belt.
Foundation Chain
To start, with the cream yarn, chain enough to comfortably wrap around your waist, which should be approximately between 140 to 170 chains depending on your fit.
Row 1
- After creating your foundation chain, start by placing your hook in the second chain from the hook. This is where your first single crochet stitch will be made.
- Work 1 sc in each chain across the row.
- At the end of this row, you should have a total of 139 to 169 single crochet stitches, depending on your original chain length.
- Turn your work to begin the next row.
Row 2
- Chain 1 to start the row and turn your work.
- Work 1 sc in each stitch across the row once more.
- At the end of this row, maintain the same total number of stitches as in Row 1.
- Fasten off your cream yarn once you have completed this row.
Adding Fringe
- Cut lengths of denim-blue yarn into 5-inch pieces. You will need several strands for each end of the belt.
- To add the fringe, fold each strand in half and create a loop at the end. Pull the loop through the edge of the belt at the ends.
- Pull the tail ends of the strand through the loop to secure it in place and create the fringe.
- Repeat this process along the ends of the belt until you have an even distribution of fringe strands.
- Finally, trim the fringe evenly to your desired length for a polished look.
Tips for the Best Result
- When making the foundation chain, make sure to keep the chain loose enough to prevent it from curling or twisting.
- Take your time with the fringe; evenly spaced strands will enhance the overall design of the belt.
- If you’re unsure how to form your stitches, refer back to tutorials on basic crochet techniques to build your confidence.
Common Mistakes
Foundation Chain Is Too Tight
If the belt doesn’t fit comfortably, it might be because your foundation chain is too tight. Be mindful to maintain a loose tension while chaining.
Fringe Is Not Even
If the fringe looks uneven after trimming, double-check that you’ve attached an equal number of strands on each end. Use a measuring tape for precision if necessary.
As you complete this project, don’t hesitate to experiment with different colors or lengths for a unique look. You might explore other crochet accessories such as a bandana hair accessory to complement your style. Happy crocheting!



