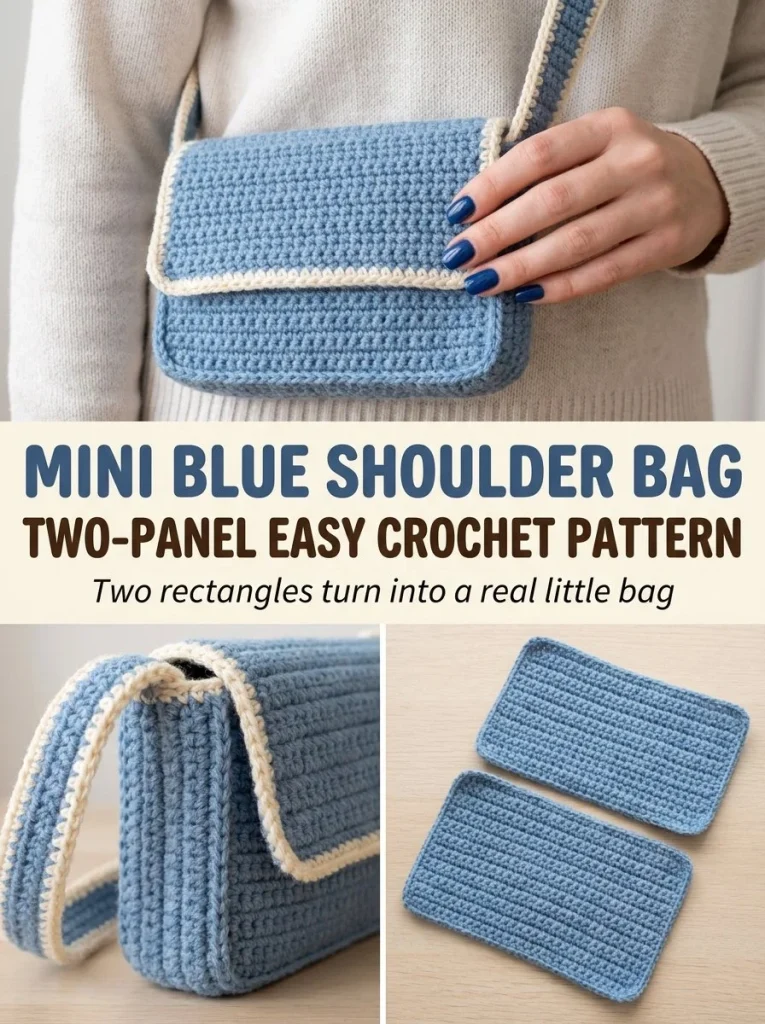
Crafting a mini blue shoulder bag can be a delightful project for crocheters of all skill levels. This bag not only serves a practical purpose, but it also showcases your crochet skills beautifully. Whether you’re heading to the beach or just need a handy bag for daily essentials, this easy pattern is designed to help you create a stylish accessory quickly. Plus, if you’re interested in more crochet bag ideas, you might want to check out this cute blue bow bag charm!
Skill Level
Confident Beginner: This project requires basic crochet skills, such as chaining and single crochet stitches. With clear instructions, even those who are just starting their crochet journey can successfully complete this bag.
Materials
To create your mini blue shoulder bag, gather the following materials:
- Soft blue cotton yarn
- Small amount of cream yarn
- 5mm crochet hook
- Tapestry needle
- Scissors
Abbreviations — US Terms
Here are some abbreviations you’ll encounter in this pattern:
- ch – chain
- sl st – slip stitch
- sc – single crochet
Special Stitches
This pattern uses basic stitching only; however, still pay attention to accurate stitch placement for achieving a neat finish.
Gauge
Gauge is not essential for this project, but maintaining consistent tension will ensure your panel sizes are uniform.
Finished Size
The finished mini blue shoulder bag measures approximately 11 inches wide and 10 inches tall, perfect for carrying essentials while looking chic.
Pattern Notes
- The project is worked in rows.
- Each panel of the bag consists of 22 foundation chains.
- You will create two identical panels for the bag.
- The bag opening is left unsewn to allow easy access.
- You can add a decorative cream row on the strap or opening if desired.
Crochet Instructions
Part 1 – Bag Panels
Panel 1
-
Foundation Chain: Begin by chaining 22 stitches.
-
Row 1: Starting in the 2nd chain from the hook, work 1 sc in each chain across (total of 21 sc).
-
Rows 2-22: Ch 1 to begin the row, turn your work, and sc in each stitch across for a total of 21 stitches. Repeat for a total of 21 rows.
After completing Row 22, fasten off the yarn. You should see a rectangular panel measuring around 10 inches tall.
Panel 2
Repeat all the steps for Panel 1 to create your second panel.
Part 2 – Assembling the Bag
- Place both panels together with the right sides facing inwards.
- Use a tapestry needle and matching yarn to seam the two panels along both sides and the bottom. You can either sew or use slip stitches to attach them securely, leaving the top open for the bag opening.
- Fasten off and weave in any loose ends for a clean finish.
Part 3 – Making the Strap
- Chain a length of approximately 80-100 stitches or until you reach your desired strap length.
- Once the chain is complete, sc back across the chain, working one sc in each chain stitch.
- Note: The number of stitches can vary based on personal preference for strap length. Aim for a comfortable fit.
- Securely attach the strap to the upper corners of the bag by sewing it down with a tapestry needle.
Optional Cream Trim
To add a lovely decorative touch, work one row of cream yarn along the edges of the strap or the bag opening. Simply repeat the sc method used in the main body.
Tips for the Best Result
- Ensure that your tension is consistent to maintain the shape of the bag.
- When attaching the strap, make sure it is securely sewn at both corners to ensure durability.
- If you prefer a snug fit for the strap, you might want to experiment with fewer initial chains when creating it.
Common Mistakes
Uneven Panels
If your two panels differ in size, check your stitch count and ensure that your tension is consistent throughout. Each panel should contain the same number of stitches and rows.
Loose Seams
If your seams are coming loose, consider using a tighter tension when seaming together or choosing a sturdier stitch (like slip stitch) for more durability.
Finishing
Once your bag is assembled, trim any excess yarn tails and weave them securely into your work. If desired, block your bag for a more polished look.
Care
To keep your mini blue shoulder bag looking great, hand-wash it gently in cool water and lay it flat to dry; do not wring it out.
If you enjoyed making this crochet project, consider exploring additional designs, such as this mini blue seashell bag charm, for more crocheted accessories. Happy crocheting!



