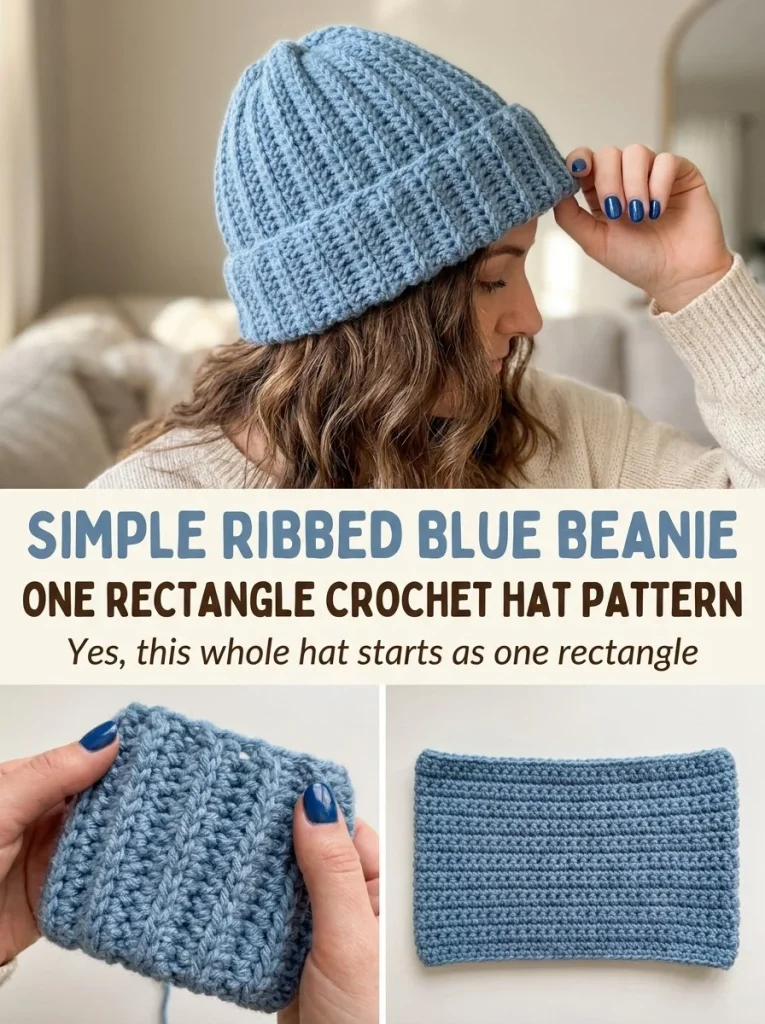
The Simple Ribbed Blue Beanie is a delightful project for crochet enthusiasts looking for an easy yet stylish hat. This pattern consists of basic stitches and techniques, making it suitable for beginners and confident beginners alike. The final product is not only comfortable but also adds a cheerful pop of blue to your winter wardrobe. If you’re looking for more crochet patterns or accessories, be sure to check out the blue bow bag charm crochet accessory pattern for another fun project after you complete this beanie!
Skill Level
Confident Beginner
This pattern uses basic crochet stitches, making it perfect for someone who has mastered the fundamentals and is ready to create a wearable accessory.
Materials
- Worsted-weight soft blue yarn
- 5mm crochet hook
- Tapestry needle
- Scissors
- Stitch markers (optional)
Abbreviations — US Terms
- ch – chain
- sc – single crochet
- BLO – back loop only
Special Stitches
No special stitches beyond basic crochet techniques are used in this project.
Gauge
Gauge is not critical for this project; however, maintaining consistent tension will help ensure a comfortable fit.
Finished Size
This beanie is designed to fit most adult heads, approximately 20-24 inches in circumference.
Pattern Notes
- This project is worked in rows.
- The starting chain is a multiple of 1.
- The turning chain does not count as a stitch.
- You will be working primarily in back loops to create a ribbed effect.
Crochet Instructions
Foundation Chain
To begin, create a foundation chain of 31 chains.
Row 1
- Start in the second chain from the hook.
- Work 1 sc in each chain across (30 sc total).
- Turn your work.
Row 2
- Turn your work and chain 1 (this does not count as a stitch).
- Working in the back loop only, sc across to the last stitch (30 sc).
- Turn your work.
Repeat Rows
Repeat Row 2 until the rectangle comfortably wraps around your head, approximately 44 to 50 rows, depending on your yarn and tension.
Seaming
- Once you have the desired length, fold the rectangle in half with the last row lined up with the first.
- Seam the first and last rows together using your tapestry needle.
Gathering the Top
- Thread yarn through the stitches around one open end of the tube.
- Pull tightly to gather closed and secure firmly.
- Weave in any ends.
Forming the Brim
Fold up the opposite edge of the beanie to form a brim. Adjust as necessary to achieve your preferred look.
Tips for the Best Result
- Make sure your tension is consistent to avoid a beanie that is too tight or too loose.
- Use stitch markers at the beginning of your rows if you find it challenging to keep track of where you started.
Common Mistakes
Uneven Ribbing
If your ribbing looks uneven, check your stitch count for previous rows before you seam the edges together.
Too Loose or Too Tight
If your beanie is either too tight or too loose, adjust your hook size or yarn tension in future projects.
Once your beanie is finished, you can style it in various ways or even create additional accessories to complement it, such as a blue heart corner bookmark crochet pattern. Enjoy your new knitting project and the warmth it brings!



